|
|
|
Here's a tip I learned while attending a digitizing class for commercial digitizers. The class was taught by Helen Hart Momsen. The settings she gave for what she calls the "Magic" Box were specific to her commercial software. I thought this was such a good idea for embroidering on anything with a pile that I came home to apply the concept to PE-Design and came up with my own settings. This look may not be for everyone but it is an option especially when embroidering on towels. I call it the "Embossing" Box because it matts down the fabric enableing you to embroider small text letters on top and still have a clear, crisp appearance.
Figure 1 is the traditional way we embroidered towels. I used 2 layers of tear-away with a spray adhesive and 2 layers of water soluable on top. It's not bad but it is a little rough around the edges. The letters in this design are about .25 inches.
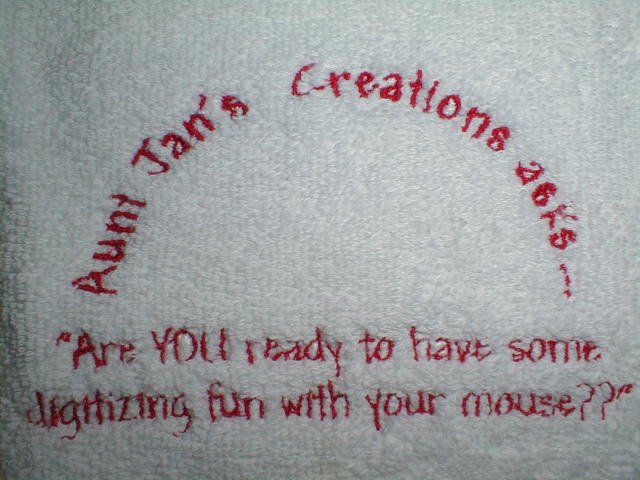
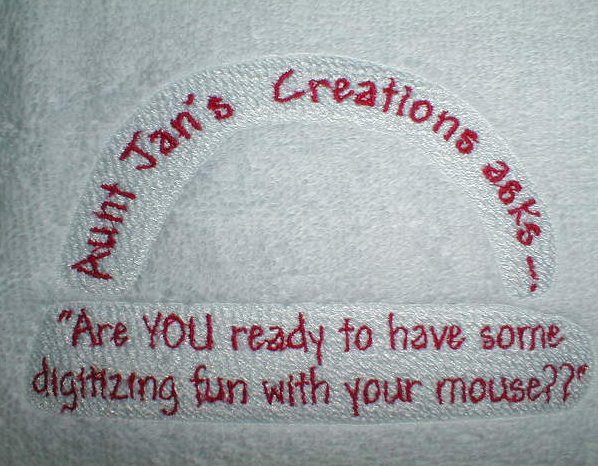
Figure 2 is the same design using
the "Embossing" Box. The box is stitched out using a color that matches
the background fabric. You can see how these letters are not buried
in the terry. They are much easier to read.
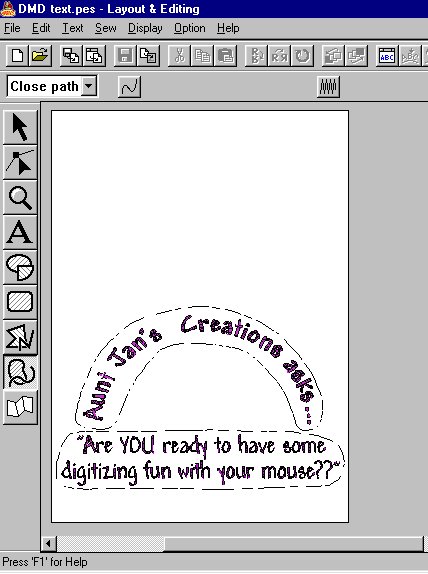
Digitizing the "Embossing" Box
In Layout & Editing I opened
my text file. I then used one of the drawing tools and have the sewing
attribute setting as "closed". I turned off both the line sew and
the region fill. I then drew an area around my text.
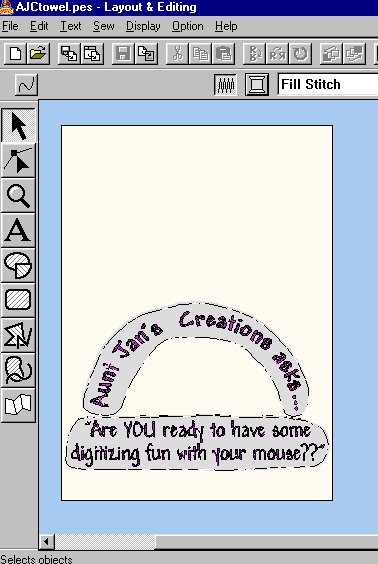
Since I have to do two more layers to create the stitches, I clicked on the region around my curved text, held down my shift key to select the box around my straight text to group them together. I then go to Edit => Copy.
I open a new design page and Edit
=> Paste. I then click on each region and change the settings
to the settings I have in the table below for Layer 1. For a color
I choose "Not Defined" so when I stitch it out I have a reminder that I
need to choose a thread that matches my fabric. I save this as xxxL1.pes
(where xxx is the name of design).
I then open a new page and Edit =>Paste. Again I click on each region and change the settings to the settings in the table below for Layer 2. I use "Not Defined" as the color. I save the file as xxxL2.pes.
Putting it all together
You should now have 3 seperate files.
It's time to put everything together. Open a new page and open file xxxL1.pes.
Next go to File=> Import => from File and bring in xxxL2.pes. Then
import your text file. Give your new file a new name and write it
to your card.
The Settings
SETTINGS FOR "EMBOSSING" BOX
| LAYER 1 | LAYER 2 | |
| Under sewing | ON | OFF |
| Density | 40 line/" (1.6mm) | 40 lines/" (1.6mm) |
| Direction | 45 Degrees | 135 Degrees |
| Line Sew | OFF | ON (zig-zag) |
| Width | .04" (1.0 mm) | |
| Density | 80 lines/" (3.1 mm) |
You can use the "Embossing" Box on anything that has pile such as terry, corduroy, polar fleece or sweat fleece. Anything where it is hard for small text to show up. You may even want to consider it for pique.
Happy embroidering!
Home/Embroidery
Services/Tutoring/Group
Lessons/Lesson Topics/Digital
Mouse Gallery/
Logo Shoppe/Collections/Freebies/Survey
Results